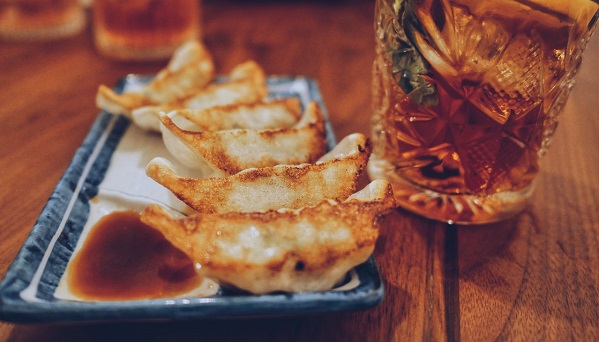
There is something relaxing and frustrating at the same time about making (folding) your own gyoza. Relaxing, because you can tune out the world and focus on channeling your inner gyoza master as you fold each dumpling by hand; yet frustrating, as your greediness will invariably result in you overstuffing each dumpling, making it impossible to close, driving you insane – the struggle of keeping the filling from spilling out is real, my friend. While folding perfectly shaped gyoza may take some practice, I promise that regardless of how your dumplings look, they will taste better than any dumpling you order at a restaurant. Even my husband can fold them – they don’t make the magazine cover, but we still eat them even though they look like a wounded duck 🙂 You can dispense with the folding all together and just pinch them close. Trust me, they will still be delicious.
Other than the folding, you will need to prep the cabbage before using it. Chop it finely (use a knife, thinly slice a section then cut crosswise into tiny pieces), then add salt to it and leave them to sit for a while to allow excess water to leach out. You can chop and gather all the other ingredients while you wait. After about 15 minutes, wring out the liquid from the cabbage using a clean kitchen towel, or cheese cloth, or brew bag, or strainer bag like this one. After that, the ingredients come together easily (the old “throw everything in a bowl and mush with your hand” method works best).
This recipe yields about 50 pieces so invite some friends. Otherwise you can freeze them (uncooked) for later. Just make sure you arrange them nicely in a freezer bag or tupperware or you will end up with a frozen clump of dumplings, and separating them will be a pain.
As for dipping sauces, I like the classic Ponzu myself, but you can dip in whatever you prefer – soy sauce, soy + vinegar combo, … anything or nothing at all.
About the Ingredients
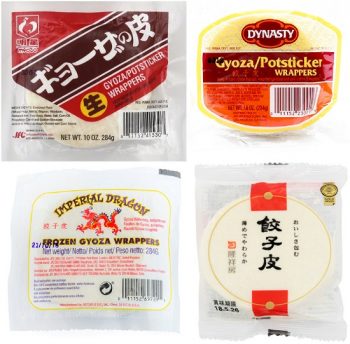
Gyoza Skins (Wrappers)
Oh the world of dumpling wrappers! There are so many to choose from! For this recipe, the best option is to pick a Japanese gyoza wrapper, but if these are not available where you live, the Chinese ones will work (I’ve tried both). The main difference is that the Japanese skins will be thinner and more delicate, but hey – beggars can’t be choosers. Both still come out tasty, although one will be a little denser. If you have a choice, get ones that are pale (cream) color, not yellow. If you buy the skins frozen, defrost them on the counter to room temperature first.
Make sure you get the ones that are round, not square. We will make something with square ones on another post.
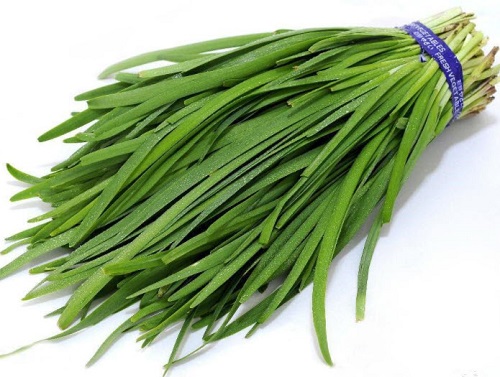
Garlic Chives
Not to be confused with onion chive (the chive you put on baked potato, soups, and French dishes). The most immediately noticeable difference will be the shape – garlic chives have flat blades, while onion chives (or standard chives) are circular. Then there is the other obvious difference which is the taste. Garlic chives tastes, well, garlicky while onion chives are (you guessed it) oniony. You can find garlic chives in most Chinese/Asian grocery store. In Japanese recipes (and Japanese grocery stores) they may be labeled as “nira” (which is what they are called in Japanese).
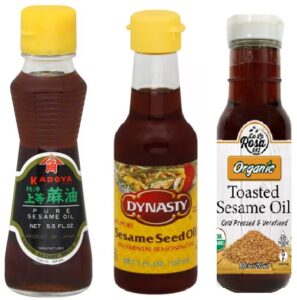
Toasted Sesame Oil
Toasted sesame oil is distinct from untoasted variety in color and fragrance. It is immediately identifiable by its dark brown (toasted) color. Untoasted sesame oil will be pale in color like any other oil. Upon opening the bottle, the toasted sesame oil will be very fragrant and have a deep, strong sesame aroma. The bottle on the left is the one I use, which you can find in most Asian grocery stores. Otherwise, you may find the two examples to the right in the Asian or International section of most supermarkets. As long as it is toasted, it will work.
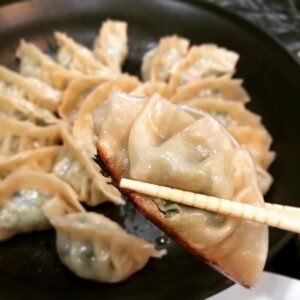
Classic Gyoza
Equipment
- Large pan (12-inch) with lid
Ingredients
For the Gyozas
- 3/4 pound ground pork
- 3 cups cabbage, finely minced
- 1½ cup garlic chives, remove the hard bottom stems and finely chop the leafy part
- 3-4 cloves garlic, finely chopped
- 2 tbsp ginger, finely chopped
- 1 tbsp soy sauce
- 2 tbsp toasted sesame oil
- 2 tsp sugar
- 1/2 tsp salt
- 1/2 tsp pepper
- 2 tbsp katakuriko (potato starch), can substitute with corn starch
Other ingredients you will need
- extra starch or flour for dusting
- 1 pkg gyoza skins, about 50 pieces
- 1 tbsp oil for frying, used for cooking the gyoza
- 2/3 cup water, used for cooking the gyoza
- 1 tbsp toasted sesame oil, for drizzling over cooked gyoza
How I Make It
Prep the Cabbage
- Shred and finely mince the cabbage (use a knife, a food processor can turn it mushy). I slice the cabbage thinly by hand, then chop them up into fine little pieces. You will need about 3 cups total.
- Put the minced cabbage in a bowl and sprinkle with a tablespoon of salt and mix well. Let the cabbage + salt sit for about 15 minutes. You can prep and gather all the other ingredients while you wait. After 15 minutes, squeeze the liquid out of the cabbage using a cheese cloth or thin kitchen towel. This step is important, so do not skip! Otherwise you will end up with soggy dumplings.
Make the Filling
- Combine the remaining ingredients (pork, chive, ginger, garlic, soy, sesame oil, salt, pepper, sugar, starch) in with the cabbage. Mix well (using your hands works best!).
Fold the Dumplings
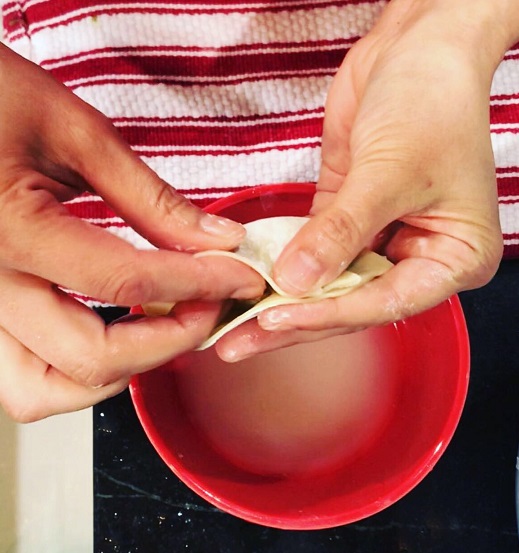
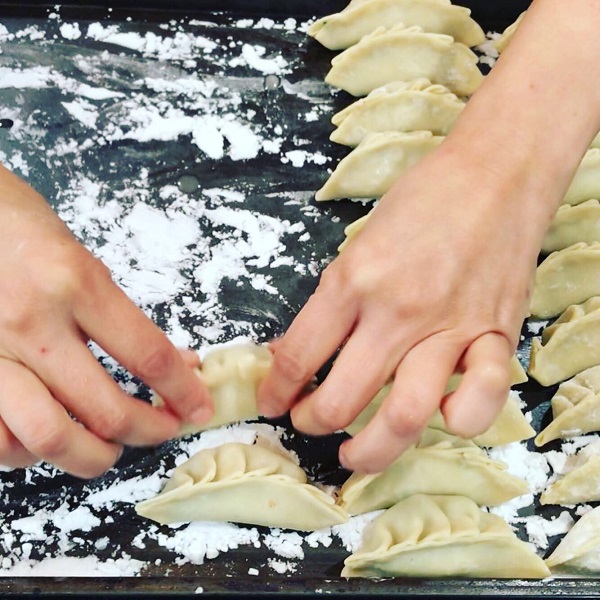
- Prepare your work space by laying out all your components - gyoza skins, pork filling, a tray for putting the folded gyozas (dusted with some starch to prevent sticking), and a small bowl of water mixed with starch to create a "slurry" which you will use as the glue to close the dumplings.
- Take one wrapper and put it in the palm of one hand. Scoop in about a tablespoon of filling (don't get greedy or you won't be able to close the dumpling!) Wet the edge of the wrapper using the water/starch slurry. Fold the wrapper in half (like a taco) and use the index finger and thumbs of both hands to pinch (pleat) the ends over each other. I promise to one day post a video of how to do this, but for now there are a lot of tutorials out there on folding gyozas. Lay out your folded gyozas in a tray, folded (pleated) side up. Repeat until you've used all the fillings (or run out of skins, whichever happens first).
Cook the Dumplings
- Preheat a pan (preferably non stick) or cast-iron skillet over high heat for a 2-3 minutes. Add about 1 tablespoon of oil to the hot pan and make sure the entire surface is coated.
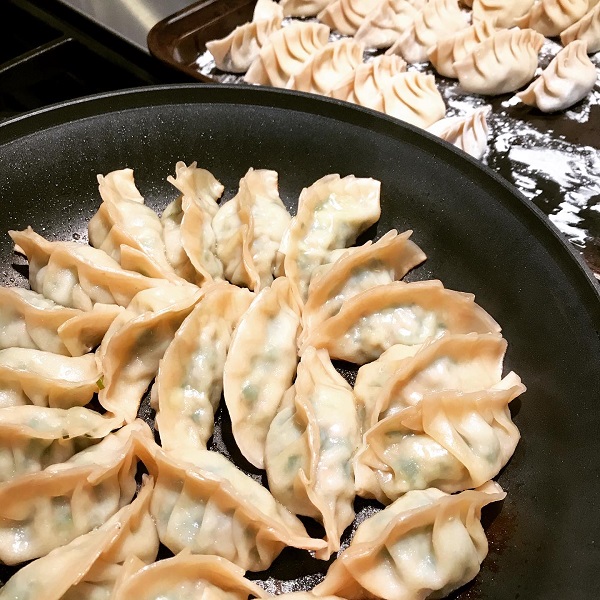
- Begin adding the gyozas in a neat row, one at a time, folded side up, going around the circumference of the pan. A 12- inch pan should hold about 20 gyoza. Once they are all added, let them fry in the oil for about 15 seconds. Quickly pour water into the pan and cover the tightly with a lid. The pan will quickly fill up with steam, which will finish cooking the gyoza.
- Continue to cook (steam) the gyoza for about 4 - 6 minutes or until most the water has absorbed when you lift the lid. Remove the lid, drizzle sesame oil over the top and cook with the lid off for another minute. The gyoza should look glossy with the skin cooked through and the bottoms should be browned and crispy.
- Transfer to a plate and serve hot. Dip gyoza in Ponzu or soy or soy/vinegar combination or anything you like. I always add chili oil or siracha or some other chili something to my dip.
Freezing Extra Gyoza
- You can freeze left over (uncooked) gyozas in a freezer bag or tupperware. I normally pre-portion them out to individual servings 6-8 pieces. When storing (freezing) gyoza, arrange them neatly with the seams facing up, in the bag or container. When you pull them out of the freezer, they will likely be frozen stuck together and hard to separate. Arranging them nicely will save you from having to break them up or letting them thaw in order to separate the pieces.
- Cook frozen gyoza the same way you would the fresh ones. You will need to use more water (about 3/4 - 1 cup) to and steam for a little longer (about 8-10 minutes).

